Category Archives: free patterns

knit-a-beard

I’ve had some requests in the last couple of days for that beard pattern I mention in this post.  At this point it’s rather belated for Halloween crafting, but I thought that perhaps it might fit into some people’s Christmas plans.

And at least this way it’s out there for next year.

Disclaimer: This is a very loose, very rough tutorial, not a full scale knitting pattern, for a gnome/Santa/old man/wizard/what-have-you beard of all trades.  Obviously it has not been test knit or anything of that sort.

For both of these projects we used Sensations Cello eyelash yarn in ‘white’.  Snotty yarn snob that I am, normally I wouldn’t be caught dead knitting with novelty yarn and synthetic fibers at that, but it’s strange the things that crazy requests from cute kids will do to you.  It’s considered a bulky yarn, I guess because of the eyelashes, but it doesn’t seem the least bit bulky to me.  One ball is sufficient for this pattern (more may be needed for some of the variations).

You’ll also need a set of size 7 (4.5mm) needles, a length of 1″ elastic, matching thread and either a hand sewing needle or a sewing machine.

gauge is approximately 17 stitches and 22 rows per 4″ of unblocked garter stitch

Beard knitting notes, more or less as written in my notebook:

we start by making a little mustache…

row 1: co 5

row 2: k across

row 3: co 1, k to end, co 1

row 4: K1, bind off 5, k1

row 5: co 2, k1, co 8, k1, co2

**note: we’ve found this mouth shaping to fit and work for everyone in our family, that doesn’t mean it will be perfect for you, but consider it a one-size-fits-most.  I really just can’t-stop-typing-like-that-today.**

increase section: work 6 rows, casting on 1 stitch at the beginning and 1 stitch at the end of each row

K5 rows (7 for a larger beard)

repeat increase section

k 10 (33) rows

decrease row: k1, ssk, k to last 3 stitches, k2tog, k1

K 5 rows

repeat decrease row

K 5 rows

repeat decrease row

K 3 rows

repeat decrease row

K 3 rows

repeat decrease row

K 2 rows

repeat decrease row

K 2 rows

repeat decrease row

K 1 row

repeat decrease row

K 3 rows

repeat decrease row

K 3 rows

repeat decrease row

K 2 rows

repeat decrease row

K 5 rows

k1, k2tog, k1

K 3 rows

k3tog

break yarn


Picking up stitches for chin strap:

You should now have this kind of funny shaped thing that looks like a trapezoid with a hole in it on top of a big inverted triangle.  Starting at the very top corner of one of the sides of the trapezoid, pick up 5 stitches, working your way down towards the triangle part.  I know this needs a visual aid.  I’m sorry I don’t have one to offer at the moment!  This should take you about half-way down the side of the trapezoid.  If you would like a wider chin strap, feel free to pick up more stitches.  Knit approximately 8 rows.  This will depend on how far up the cheek and into the hair line you want the beard to go.  Repeat what you did on the first side for the second side.

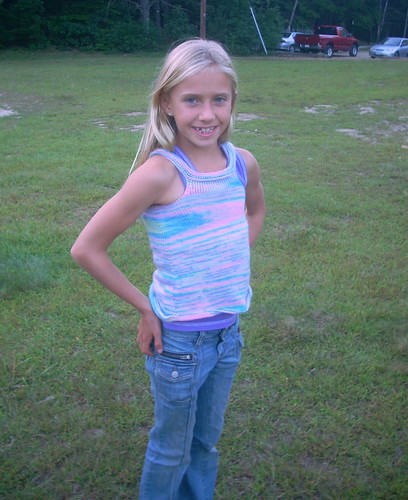
This is the exact way I knitted up the gnome beard, pictured on a 5 year old above.

Attaching the elastic band:

This design includes an elastic band that goes up and around the back of the head creating a very secure beard that conforms to the contours of the face in a more realistic way.  Most people seem to like wearing it with the band just above their ears.  This band can either be covered with a hat (as shown) or it could be camouflaged with additional yarn.

Sew one end of the elastic to the under side of one of the chin straps.  Try on the beard, stretching the elastic across the back the head to get a good fit.  Trim the extra elastic, sew the other side in place and you are done!

After working in the ends we opted to trim back some of the eyelashes around the mouth area, mostly because no one thought they tasted very good.

 For a longer beard:

As shown on Santa above and Dumbledore below, simply increase the number of rows in between the shaping.  Suggested row counts for the beginning sections are in parenthesis.  Elijah and I were both working on that beard and I guess I stopped taking notes after that.  Be sure to mix up the number of rows you use to give it a more natural look.  A straight edged triangle with shaping at regular intervals will not look right.

For a beard with a rounded bottom edge:

Work as above until the first decrease row.  At this point you can either work straight or as above until the beard is approximately the desired length (presuming that you are wanting a shorter beard then the one above, otherwise you will run out of stitches).  Decrease at the beginning and end of each row for a couple of rows before binding off.  This will round off the corners.  How much rounding off you wish to do is entirely up to you.  Continue with the pattern as written starting at the “chin strap” section.

…….

It does knit up quickly, so if Halloween has been delayed for you, due to the storm, you may just be able to get one made in time after all.

Enjoy!

By

Another Scrappy Gnome Hat

Remember when I first posted the Scrappy Gnome Hat pattern?  In that post I said, “It also knits up extremely quick. Like, need a gift for tomorrow? This is the way to go, quick.”  Well, over the weekend I got to put that theory to the test when at bedtime, the night before a 7th birthday party for a dear little friend of the family, my children informed me (in something of a panic) that all of their well thought out gifts had somehow gone all wrong.  Some things had lost parts, others had just not come together properly, next to nothing was actually done and ready for gifting (with the exception of a potholder from Galen of course, and what 7 year old doesn’t just dream of his very on potholder?).  It was at this point that they asked if I could please make something for him.  I gave them a couple of options and they thought he would like the gnome hat.

After consulting on the colors, they went to bed and 4 regularly interrupted hours later, the gnome hat was complete.  Mission accomplished.

New: I’ve now updated the Scrappy Gnome Hat pattern to include and easy to print PDF as well.  You can get your copy here or on the official pattern page.  Happy knitting!


By

The Scrappy Gnome Hat Pattern

Clearly my presence here has been kind of spotty lately.  I thought about doing a “where I’ve been” type post, but then I figured I’d never get around to it, so how’s about a cute free knitting pattern instead?

1

These two are just silly!

2

Though the silly hats aren’t actually for them, they are for these little guys…

3

4

This pattern is pretty much as easy as knitting gets.  It’s the perfect keeping-your-hands-busy-while-doing-something-else kind of knitting, in two sizes, that as it turns out, fit just about everyone.  It also happens to be the ideal stash busting project.  In fact, that’s the whole idea behind it!  It also knits up extremely quick.  Like, need a gift for tomorrow?  This is the way to go, quick.

So this is what you’re going to need:

A set of size 13 double point needles

and

A bag, basket, pile, whatever (!) of scrap yarns,  both worsted and bulky weight, in colors that complement each other.

that’s it.

6

Scrappy Gnome Hat

For the pattern in an easy to print PDF version, click here.

The hat comes in two sizes.  The baby/toddler size is first, fitting around 6 months-2.5 years (It’s shown here on both a one year old and a two year old), with directions for the kid/adult version following in parenthesis (shown here on a 3 year old, a 5 year old and a 31 year old).  The entire hat is worked in the round while holding both a strand of worsted and a strand of bulky yarn.  As you run out of one yarn, replace it with another like weight yarn.  The two different colored yarns are what give the hat it’s heathered appearance.  Switching one yarn at a time means that one section kind of blends and fades into the next.

CO 42 (52) sts, pm, join in the round

K 3 rounds

Round 4: K2tog, K 20 (25), K2tog, K to end

Continue even until hat measures 4 3/4″ (5 1/2″)

On the next round: *K8, K2tog* 4 times (*K8, K2tog* 5 times)

K 3 (4) rounds

On the next round: *K7, K2tog* 4 times (*K7, K2tog* 5 times)

K 3 (4) rounds

On the next round: *K6, K2tog* 4 times (*K6, K2tog* 5 times)

K3 (4) rounds

On the next round: *K5, K2tog* 4 times (*K5, K2tog* 5 times)

K 3 (4) rounds

On the next round: *K4, K2tog* 4 times (*K4, K2tog* 5 times)

K 3 (4) rounds

On the next round: *K3, K2tog* 4 times (*K3, K2tog* 5 times)

K 3 (4) rounds

On the next round: *K2, K2tog* 4 times (*K2, K2tog* 5 times)

K 1 round

K1, K2tog around

Larger size only:

(K 1 round

K2tog around)

Both sizes:

K 5 rounds

K2tog around

switch to knitting a i-cord for around 6 repeats

bind off and work in ends

If you knit it, let me know how it turns out!  And, as always, I’d love to see pictures!

You can check out other people’s gnome hats and post your own here on Ravelry.

7

Hee-hee!  He looks like a little garden gnome, doesn’t he?

And who knows?  Maybe someday I’ll even get around to posting about that sweater.

By

Mardi (a.k.a. the rainbow dress/tunic/tank)

I finally typed up the pattern for my one-size-fits most 6 months-6 years, grow-with-me dress-tunic-tank (it also looks adorable when worn as a jumper or sweater vest). More photos and information can be found here and here.I think that for a larger child, going up a needle size, using thicker yarn and adding a bit of length should do the trick. If anyone tries this, let me know how it turns out! As is, it fits up to a 24″ chest quite comfortably.I’ve decided to call it Mardi, after the friend that sent me the yarn to begin with!
Mardi
Materials needed:
Size 2 circular needles
dk weight yarn
stitch markers

Gauge:
6 sts= 1″

Straps:

CO 125 stitches, join round
*Round 1: knit
Round 2: purl*
Repeat from * to * 3 times
Round 9: knit


Front Shaping:
Row 10: K15, bind off 35, k25
*You will now work back and forth in twisted stockinette (purl one row, on the next row knit all stitches through the back loop.  repeat these two rows) on these 25 stitches, working the first and last 2 stitches in garter stitch (knit every row)* for 4 rows.
Row 5: k 2, kfb, k to last 3 stitches, kfb, k2*
Repeat from * to *
Break yarn

Shoulder strap shaping:
Join yarn and bind off the next 35 stitches

Back shaping:

*K2, work stockinette to last 2 stitches, k2, turn* for 4 rows.
Row 5: k 2, kfb, k to last 3 stitches, kfb, k2

Repeat these 5 rows for a total of 3 sets.


Joining:
Cast on 10, place marker (this is the new beginning of a round), cast on 10
K across front, cast on 10, place marker, cast on 10, knit across the back to join the round.

Body:
*Kfb, k to 1 stitch before marker, kfb, slip marker, kfb, k to last stitch before marker, kfb

work 4 rounds even*
Repeat from *to* until front measures 13” or to desired length

Trim:
*K one round, P one round*
repeat from * to*
Bind off all stitches
As always, I’d love to see it when you’re done!
Find Mardi on Ravelry here.
By

Crafting with Little Ones

I think a lot of people are intimidated by the idea of crafting with young children. This is a simple, open-ended project that anyone with basic hand-sewing skills can share with a child. All it takes is some time and patients. You can decide how much or how little you would like your child to be involved. In our house this was a full hands on project for 3 year old Galen.

~Front view of the “Angel Baby” Galen created as a first birthday gift for his sister~

Step 1: Decide (and if necessary figure out!) what your child would like to make. We narrowed down Galen’s list of things to these three: a rainbow dog with a jingling bell in it’s tummy, a rainbow bird with a jingling bell in it’s tummy and a rainbow angel with a jingling bell in it’s tummy.

Before we could start I needed to get a better idea of what he had in mind so that I could do my best to stay true to his vision. Talking helps to figure out where to start, but to get a really clear idea, you have to move beyond that, which brings us to step two.

Step 2: Get out a large sheet of paper and start drawing. If the child you are working with is very small, then sketch what you think they might be talking about. Let them tell you all the things that are wrong with your drawing! It’s ok. This is their project, you’re just the facilitator here. Keep going. Make the head bigger where they say, add a tail, or bat ears, etc, until they are happy with the shape. Beware of the child that likes to make mommy do tricks! At some point you might have to say, “You know what, I’ll draw over 10 sheets of paper taped together for you some other time. I think we should keep this project about this big.” And then show them just what would work best.

An older child may very well be able to draw just what they are looking for, right off the bat. We’ve made a lot of these little stuffed toys over the years, and each is as unique as the child who designed it.

Step 3: Now that you have your basic, and hopefully fairly simple, design, it’s time to trace it. You can use regular tracing paper, Swedish tracing paper, tissue paper, a scrap of interfacing; whatever you have around. Just clearly trace the pattern.

Step 4: Pin it to previously selected fabric and cut. If you are planning on Kool-Aid dying the fabric (as we did with this particular one) then it would be best if the fabric is wool. Wool felt would be ideal since there won’t be any fraying on loose edges. Our Angel Baby was made from a lightly felted wool jersey.

Step 5 (optional): Painting the fabric. I offered one color at a time of a strong mix of Kool-Aid for him to paint directly on to the fabric with a paint brush. Once the painting is done, the fabric needs to be steamed for approximately 40 minutes and then rinsed well.

**At this point it’s probably time to put this project away for another day. Don’t be afraid to start an on-going project with a young child. So long as you are clear up front about the time line, they will be fine with it, and excited about the next time a crafting day comes around.**


Step 6: Sewing. I find that embroidery floss and a large doll makers needle are best suited to this type of sewing. For most stuffed animals you will just be sewing a front to a back and then maybe adding on some ears or something afterward. For this project I had the idea of cutting out a circle and layering a piece of skin tone cotton underneath. Be careful with your cutting though! I thought this was a sweet idea that would get him closer to what he was looking for, when in fact, it made him cry! There is a certain line that needs to be walked between anticipating and guessing at what their real goal is and letting the project really be the way they see it. You can’t always be sure which one you are doing! I’ve had it go both ways. One of the first things Elijah ever made was a doll with green skin, red eyes, a gold mouth and a purple hat. I made some suggestions of “normal” eye colors, but he wasn’t interested and he walked away very please with his work. Other times I’ve had a child bemoan the fact that something that they were making didn’t look like a “real, for real…”(moose in the case that I’m thinking of) because I held my tongue and didn’t make suggestions to improve it. I say this not to turn you off the idea of sewing with a little one, but to give you an idea of how to make a positive experience.

I told Galen that if he didn’t like how this one turned out, we would make another one, exactly the way he wanted it. Thankfully, he ended up loving this one and no more tears were shed.

Back to the project: We did some very simple embroidery for the face, then I pinned it to the underside of the front piece and stitched around the opening. Next we pinned front to back (wrong sides together) and stitched most of the way around, leaving an opening for stuffing. As you may or may not be able to see, Galen requested may colors of embroidery floss in keeping with the rainbow theme!

We used a basic whip stitch here.

I would like to offer a few tips and ideas for sewing with preschoolers:

  • sit them on your lap so that you can guide their work
  • keep the thread or floss relatively short so that it’s less likely to get tangled
  • take turns between you doing the sewing and placing the needle for them to pull through
  • sing songs while you sew
  • don’t sit or try to attempt this for very long stretches
  • when the child is not actively sewing, let them pull out pins and return them to the pin cushion
  • take advantage of the times when their attention is on another part of the project to make some headway yourself. With this project, I did a lot of sewing while he was picking out a bell for the tummy and carding some wool.
  • It’s best to do the tricky parts yourself and save the long, straight stretches for the little guy.

Step 7 (also optional) : Carding the wool for stuffing. You can use any kind of stuffing for a project like this, but I’m partial to wool. All the better if the kiddo gets to card the wool himself. Some day I’ll have a set of nice carders, but for now we just use two dog brushes. They are inexpensive, easy to obtain, and have the added advantage of being an excellent size for small hands.

Step 8: Stuff your project. You can use a chopstick or the eraser end of a pencil to make sure that the stuffing gets into all the little nooks and crannies. Little people love helping with this part. When your project is about half-way stuffed you can add in a bell or a rattle, if so desired.

~Back view~

Step 9: Sew up your opening and go play! Enjoy your truly one of a kind creation and the joy on your child’s face as they run up to everyone they know shouting, “Look what I made!”.

By

Iain’s Bubble Hat

Update: There is now an easy to print PDF version of The Bubble Hat pattern available.

For years now I’ve been trying to find just the right winter hat for Iain. It needed to work for both of us. He wanted something that was easy to pull on and off. I wanted something that wasn’t going to just fall off. He wanted something he liked the look of. I was all for good looks too, but more importantly I wanted something that covered his ears and kept him warm during the long hours he spends outside.

I think that we finally, finally, found THE hat.

bubble hat
And we’re both quite pleased.

He picked the main yarn; Taos by Tahki Yarns in the Autumn (004) colorway. He showed me the kind of look he liked and I designed the hat.

I wanted to use two different yarns for this and I just loved how the dark brown of this local alpaca/wool blend picked up the thread of brown through the Taos.

bubbles
I told him that since it was his hat, he could name the pattern. He says it’s a Bubble Hat, so there you go!


The Bubble Hat

One size fits most- older child through adult

materials: 1 skein each of bulky yarn in color A and color B
a set of size 9 double point needles
one stitch marker

Cast on 76 stitches with color A, join round, and place a marker
Work 15 rows of K2, P2 rib
note: I wanted it to come all the way down and cover his ears and forehead. If you would like a shorter style feel free to adjust the number of rounds accordingly.

Break yarn

switch to color B

**Work 5 rounds in ss (knit every row)
*K5B (see details below), K3*, repeat around
Work 5 more rounds of ss
K2, *K5B, K3* repeat to last 2 stitches, K5B, K1**

Repeat from ** to **

Break yarn

With color A K 1 round
*K2tog, K4*, repeat to last 2 stitches, K2
K 1 round
*K2tog, K3* repeat to last stitch, K1
*K2tog, K2* for one round
K 1 round
*K2tog, K1* to last 2 sts, K1 (24 stitches)
K 1 round
K2tog for one round
K 1 round
K2tog

Break yarn and pull tightly through the remaining stitches
Work in ends, and voila!

silly

K5B=Knit Stitch 5 Rows Below

Now I’m going to try my best to describe how to do this using words, but if you still aren’t getting it, then there is a nice picture tutorial here that should set you straight (she uses a crochet hook and I’m going to tell you how to do it with your knitting needles).

Ok, so what you are ultimately doing is working a stitch 5 rounds down from where you are.

Here’s how:
Slip the stitch that you are about to knit off of the needle and pull out the stitch below it 4 times. I know, I know, don’t be scared, it will be ok, just keep a crochet hook on hand. Now put your needle back into the loose stitch. There should be a ladder of 4 strands above it. Alright, now, from this position, with the stitch in front, your yarn in back and the ladder in between, knit the stitch. And that’s it!

back
If you make one, be sure to leave me a link, I’d love to see it!  You can find the Bubble Hat on Ravelry here.

By